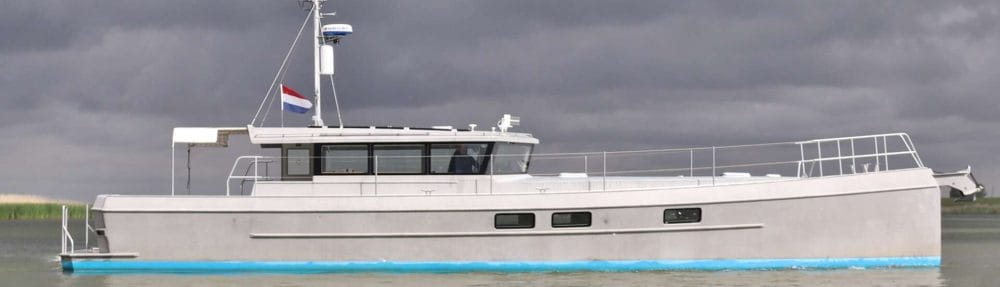
Building hull No. [X]: Our LRC58 from bare metal to blue water
Every bolt, every wire, every decision — documented honestly, so you know exactly what building an LRC58 involves before you sign the build contract.
Why we’re sharing all of this
Most boat builders show you glossy renders and finished interiors. We are going to show you something more useful: the reality of commissioning and building a serious aluminium passagemaker from scratch — the decisions, the trade-offs, the costs, and the lessons.
Not because we want to scare you off. Quite the opposite. Building an LRC58 is one of the most satisfying projects a serious mariner can undertake, because every choice you make becomes part of a vessel that will carry you around the world for decades. You deserve to make those choices with open eyes.
This section documents our own build in real time — from the first conversations with ArtNautica and our chosen yard, through the specification process, the build visits, the sea trials, and the first ocean passages. We have made equipment choices we are proud of, and a few we would revisit. We will tell you about both.
If you are considering building your own LRC, read every page in this section before you sit down with the designer. You will ask better questions, make better choices, and build a better boat.
What you will find in this section
[Equipment Choices]
We go deep on every major system: why we chose what we chose, what we considered and rejected, what it cost, and how it has performed at sea. These are not sponsored opinions — or where a manufacturer has supported the build, we will say so explicitly and tell you our honest assessment anyway.
[The Build diary]
A chronological record of the build from contract signing to splash day. Build visits, milestone photographs, the moments of frustration and the moments of quiet satisfaction when a perfectly fabricated aluminium frame emerges from the workshop looking exactly like the drawing. We will cover timeline, yard communication, specification changes, and what it actually feels like to watch your boat take shape.
[Lessons learned]
A running list of things we would do differently — specification decisions made in an office that we would revise with the benefit of sea miles under the keel. Updated as the voyage progresses.
The systems we cover
Each section below is a dedicated page with full documentation, photographs, and honest commentary.
| System | What we cover |
|---|---|
| Hull & Structure | Aluminium grade, plate thickness, frame spacing, bulkheads, keel design |
| Propulsion | Engine choice, shaft, propeller selection, fuel system, filters |
| Hybrid & Electrical Drive | Whether we went hybrid, why or why not, what we would consider next time |
| Electrical System | 24V vs 48V, battery bank, charging sources, inverter/charger, cabling |
| Solar & Renewable Energy | Panel selection, MPPT controllers, shading management, real-world output |
| Navigation & Instruments | Chartplotter, radar, AIS, depth, wind, autopilot — the full nav stack |
| Stabilisation | Active fins, gyro, or Magnus rotor — what we chose and why |
| Watermaking | Watermaker capacity, energy consumption, pre-filtration, maintenance reality |
| Anchoring System | Anchor type and weight, windlass, chain, bridle, snubber |
| Safety Equipment | Liferaft, EPIRB, PLBs, flares, survival suits, fire suppression |
| Communications | Satphone, Starlink, SSB/Pactor, AIS, VHF — what we use offshore |
| Dinghy & Outboard | Why the dinghy choice matters more than you think |
| Heating & Cooling | Diesel heating, air conditioning, ventilation in the tropics |
| Galley & Provisions | Cooking systems, fridge/freezer sizing, provisioning for long passages |
| Tender & Crane | Davit or bow crane, dinghy stowage, outboard management |
| Interior Fit-Out | Layout choices, materials, what we prioritised and what we gave up |
| Workshop & Tools | What lives in the workshop, the tools we actually use offshore |
| Paint & Corrosion Protection | The bare aluminium argument, anodising, boot top, antifouling decisions |
Our build philosophy
We had one guiding principle throughout the specification process, borrowed directly from the LRC design ethos itself:
> Simplicity that works beats complexity that might.
Every piece of equipment on this boat was evaluated on three questions:
- Does it make the vessel safer or more capable at sea?
- Can it be repaired or replaced in a port with limited facilities?
- Is the failure mode manageable if it breaks offshore?
If the answer to question 3 was “we’d be in serious trouble,” we either added redundancy or chose something simpler. An ocean-going passagemaker is not a technology showcase — it is a life-support system for the people aboard it. We chose accordingly.
Where we have accepted complexity — the navigation suite, the communications stack, the electrical system — we have done so because the capability genuinely justifies it, and because we have invested in understanding every component well enough to diagnose and address problems ourselves.
A note on sponsorship & transparency
Several equipment manufacturers have supported this build by providing equipment at cost or contributing to the project financially. We are grateful for that support — without it, the economics of a project like this are considerably harder.
But it comes with a commitment to you, the reader: we will tell you what we actually think, not what our sponsors want to hear. Where equipment has exceeded expectations, you will hear about it enthusiastically. Where something has disappointed, you will hear about that too. Sponsors who came aboard understood this before they wrote the cheque, and we will honour it throughout the voyage.
For full transparency, sponsored equipment and commercial relationships are disclosed on our [Partners & Sponsors] page.
The build diary: where we are now
[This section updates as the build progresses — entries below are placeholders showing the intended structure]
[Most recent entry — pinned]
📍 [Date] — [Yard name], [Location]
> [Most recent build diary entry — 200–400 words, first person, with 1–3 photographs]
[Previous entries]
- [Month Year] — Contract signed. The moment it became real.
- [Month Year] — First yard visit. Meeting the team.
- [Month Year] — Keel laid. The hull takes shape.
- [Month Year] — Hull plating complete. First photographs that look like a boat.
- [Month Year] — Engine installed. The heart of the vessel.
- [Month Year] — Electrical rough-in begins.
- [Month Year] — Interior joinery starts.
- [Month Year] — Launch day.
- [Month Year] — Sea trials.
- [Month Year] — Delivery passage to home port.
[CTA Button] → Subscribe for build updates — we publish every two weeks
Start Here
New to the LRC build world and not sure where to begin? We suggest reading in this order:
- [The specification process] — How we worked with ArtNautica to define what we actually wanted before we talked to any yard
- [Choosing a yard] — What to look for, the questions to ask, and what we decided
- [The contract] — What a good build contract looks like for a project of this size
- [Hull & structure] — Where it all begins
- [The electrical system] — The single most complex decision tree in the entire build
Or if you already know what you want to understand, use the system index above to go straight to the relevant page.
[Footer CTA across all Build pages]
Building your own LRC? We are happy to talk through what we learned. Use the contact form or join us for a demo trip — there is no better way to see these choices in action than at sea.
[Button] → Book a Demo Trip
[Button] → Ask Us a Question